Today its time to mount the rest of the puzzles we have completed and have not mounted yet!
 |
| All laid on a 4x8 sheet of foam board. From top left clockwise; Pencils (upside down because it fell off the first mounting and needs to be redone and its a bit sticky), Effervesently Yours, The Dreaming Tree, Venice, Donuts, Vegas, Maui Moon, Underwater Playground, Pansies and Puppies |
 |
| Rizzi all boxed up and ready to be re-assembled |
 |
| We laid each section upside down and the reassembled. The puzzle interlocks so well, you can just pick up the puzzle by the corner and turn it over as you need to. |
 |
| Here we finally have Rizzi glued to the foam board and cut to size |
 |
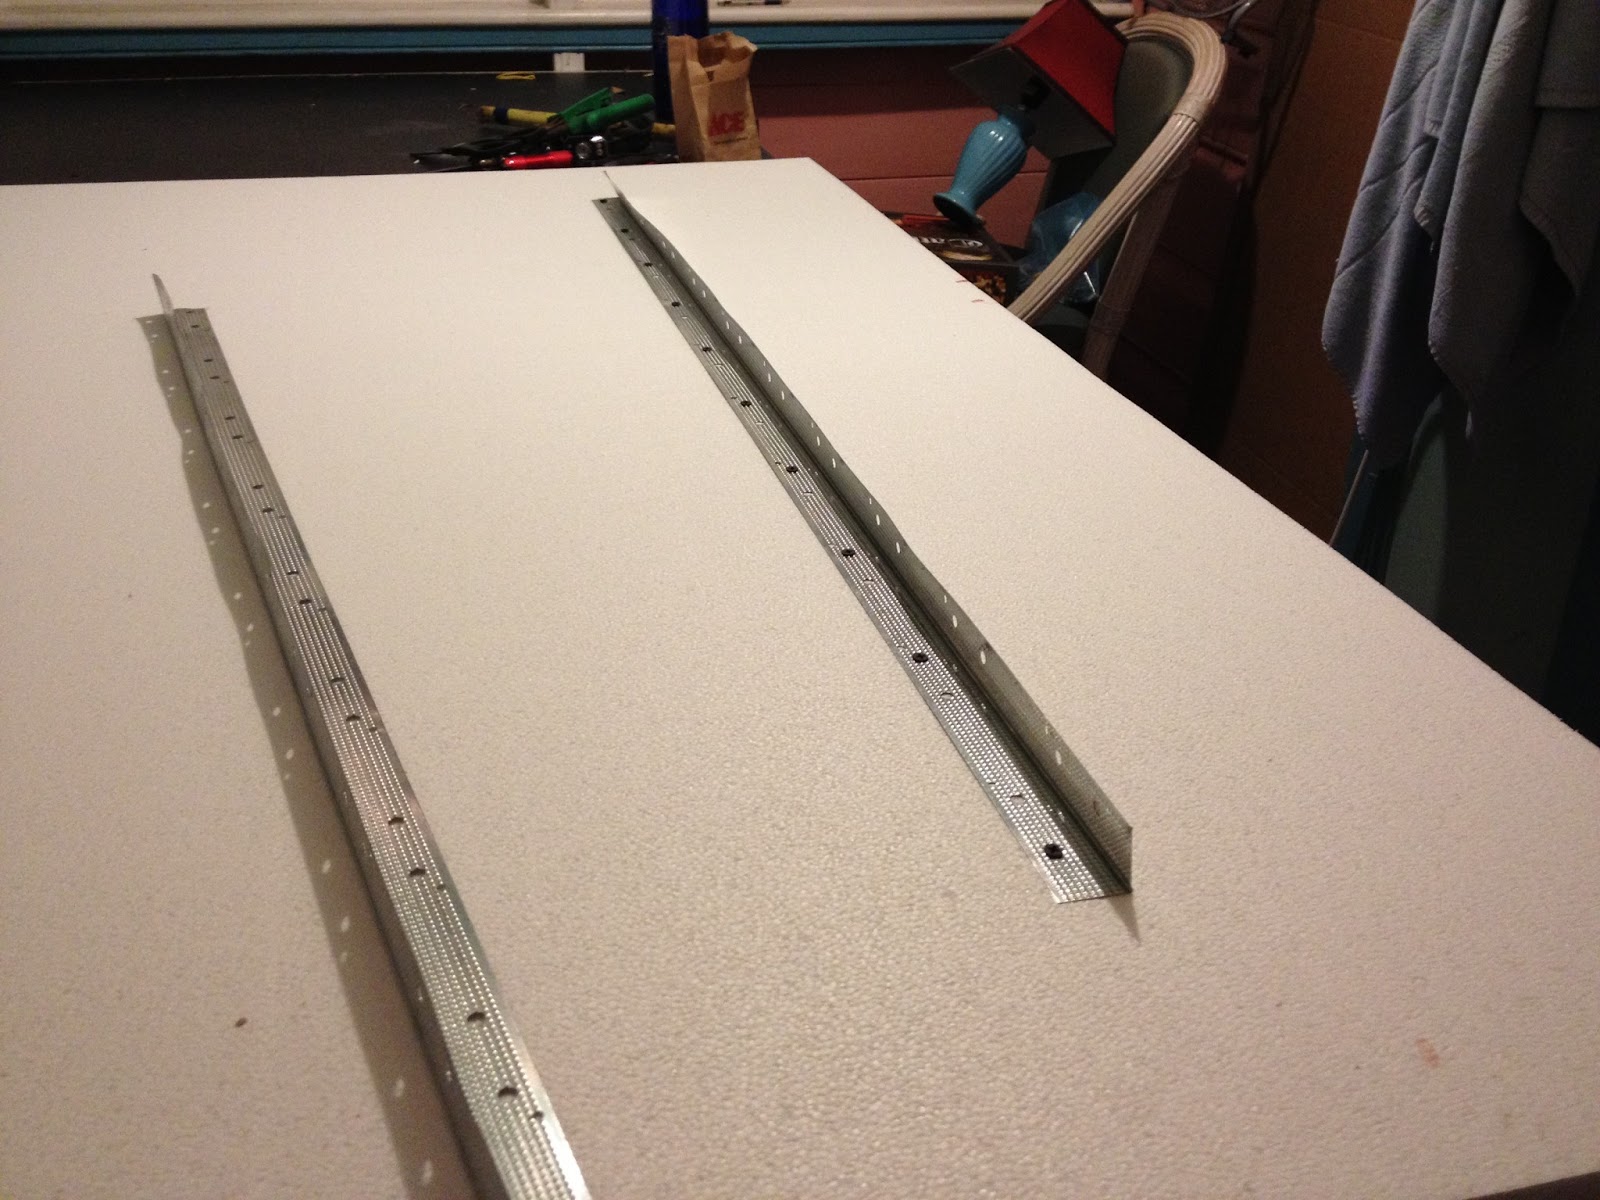
| After 1000 pieces or so, the weight of the puzzle is too much for the technique of using the string from two screws in dry wall anchors (they anchors pull out of the foam). So here we use the interlocking technique using drywall channel mount the channel so the flat part is facing down on the puzzle. Use a lot of drywall anchors (here we used 10) to spread the load. |
 |
| Take the drywall corner and mount it to the wall where you want he puzzle with the flat end facing up and then bend it up to make the V as shown. The matching V on the back of the puzzle will sit in here and give you a rock solid mount! |
 |
| Back of the puzzle showing the dry wall corner bent down and ready to hang! |
 |
| M enjoying our new showpiece! |
 |
| The puzzle wall! We are running out of space! We still need to paint a lot of edges, but finally have all the puzzles mounted! |


Awesome job guys! The Rizzi puzzle looks amazing above the bed, and the wall color behind it accents it really well too. I like your new mounting technique with the drywall channel. Does the channel come flat and then you have to bend it into a v yourself or does it come mostly bent that way to begin with?
ReplyDeleteI could potentially see using that technique with the Life puzzle; although, I'm not 100% sure I'd be using insulation foam vs. the foam board (like Scott Slater uses). If I use the latter, it may not be thick enough to support all the drywall screws I'm thinking. Hmmm....something to consider.
Do you guys like the insullation foam better than regular foam board? Or what was your reasoning behind using it instead?
Penny
Well, the reasoning behind foam board is cost, availability, and thickness. Since we are not framing them, the thickness the foam sheet gives the puzzle a great 3D look on the wall. The cost of the foam is 11 dollars for a 4x8 sheet here on island, equivelent foam board from officemax would be about 45 dollars.... (ok that could be an exaggeration).
DeleteRegarding the channel, its standard drywall corner material available in the building supply section of home depot for about 3 dollars for a 10 foot section. It comes already in an L. (You just have to bend into a V). I would highly recommend this for life (its how we will do any large puzzle now). The idea is that is spreads the load across the whole puzzle. When we move, I will happily bring down Rizzy and take a picture of how it held up on the back.
This idea originally came from a large piece of art I had in the states, but framing materials are hard to come by here so I made something up. I think it costs about 1/100th of what you could get at a framing store and does just as good a job. (there are commercial options of this available)
HINT: Before you do life, do a couple of 500 piece puzzles and try this technique and see that you like it, it took me a few to get it perfect. You can call me or email me for exact help, I will just make a video of the hull process from start to finish on the next puzzle :-)
But in my opinion, for life, you should spend the money and have a great frame made for it!
Interesting idea to mounting. I'm not sure why you are trying to use drywall screws. I've only ever used nails to put up all our puzzles. I just nail directly through the puzzle into the drywall and try to hit a few studs if I can. I put nails primarily along the top and a few more down the sides and along the bottom. I've never had a puzzle fall off the wall yet. Some have been hanging for 15-18 years.
DeletePurely for aesthetics. Using the screws, I can attach a string or a V bracket and hang it like a normal picture (Giving it the angled down effect I like). I tried the nailing thing, and I found that I didn't like nails showing through my work of art. This way when we save up some money for a very large framing project, the puzzles wont have holes in them or possibly be distorted where the weight pulled on the nails. Anyhow, just a preference, thought I would share.
Delete